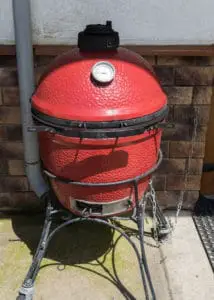
If you have heard of the grillers called Grill Dome, The Big Green Egg, Kamado Joe, and Primo Ceramic Grills then you have heard of what is known as the modern-day Kamado. Withstanding temperatures in excess of 750 F without even a crack or temperature fluctuations they are made out of a combination of terracotta, crushed lava, and high-temperature ceramics.
The best reason to buy one of these Kamado’s, apart of being the guy or girl to visit for any outdoor cooking and the talk of the town, is that you will have at your fingertips, in your own back yard or entertainment area, on a full kitchen with all accessories associated with different cultures from around the world. Now imagine having all that plus the incredible and handy versatility that is out of this world.
Now invite over your best friends and or your family and you pull out your Kamado and you start grilling, high temp searing (like all the best steak houses do it), do a nice slow smoke-out, bake and even make an original wood-fired pizza, as the real Italian pizzerias do it.
Then end off the night with preparing different types of food by cooking it they do it in a restaurant or as your mother did. You will be the most talked about man or woman in your town and will have entertainment guest lists for years to come.
Let us start with a little history of kamado grills. So that you know were it cames from and how it made its way around the world to your back yard.
History Of the Kamado Grill
Archaeologists that have dug up ancient Chinese and Indian civilization clay pots claim to be the origin and birthplace of the more improved version Kamado of today. It is believed that between about 350 and 500 A.D.(about 200 years ago) the Chinese were the ones that introduced it to the Japanese.
They, in turn, mastered this art form of not using the pots but making it in different ways and refined it to suit their own diets and styles of cooking as their staple diet being rice, hence the development of the rice cooker which we even use today but known then as “mushikamado”.
As it only contained water and rice. Translated from Japanese, who we all can thank for this Kamado, it is translates to “stove” or “cooking”. This is the precursor to the modern Kamado grill it is actually unknown as to when a cooking grate was added to the mushikamado, to cook their meat and fish.
Using cargo planes just after World War Two the westerners started flying them back to the states when they discovered the amazing and growing popularity of the Kamado. Especially how unique, easy and versatile the cooking became using only the mushikamado.
Once back in the states and the demonstrated this amazing cooking system, they set up shop and started producing their own line of Kamado grills.
One of the first American entrepreneurs to fall onto this idea, Ed Fisher, and started manufacturing Kamados in his own factory. He quickly realized the life span of the Kamado was only a short couple of years. Due to the cement mixture being used by his suppliers and selling these was not in his best interest.
He then came up with a new line of Kamado cookers and grillers using much more experimental and modern space-age ceramics back in 1974 just so that he could raise the bar in standards compared to the weak and short-lived imports.
His new design and products not only retained heat and moisture better than his previous imported products but more importantly and thankfully it was and still is able to stand up against all the outside elements and exposure for more years than the predecessors.
The Different Parts of a Kamado
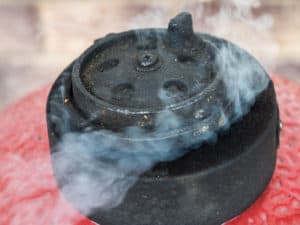
Let’s look at what makes up this amazing piece of grill equipment but remember as you get different styles, shapes, sizes and combinations parts may differ in size, shape or where situated but will almost always be the same parts.
Top vent
The Top Vent is sometimes called the upper air vent and can be found on the top of the dome. The main purpose of the top vent is for fine control of the temperature.
Cooking Grates
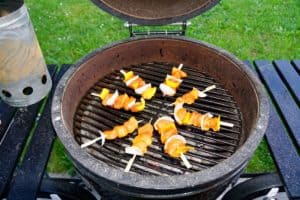
Located at the top of the kamado just under the dome the cooking grates are the first thing you’ll see when you open the dome. You can get cooking grates in all types of metal but most often you will see stainless or cast iron.
Normally a stainless steel grate that holds food while cooking on this with your Kamado, but depending on what and where you want to cook there is a surplus of options as extras, that can accommodate anything and everything you want to grill or cook.
But we always advise and recommend the original stainless steel grate just until you get the feel of your new Kamado but this can only be done with consistent use of both the stainless steel grate and your Kamado time after time, as well as with different fuels and temperatures.
This way you will know how different fuel affects your kamado and how to grill with them. Once you’ve master grilling on your kamado with the stainless steel grates then I suggest you try some of the extras. But try them one at a time to get the right fit for its uses as you have done with the stainless steel grate.
Some of the different extras that can be bought later are.
- Extender Racks
- Swing Racks
- Cast Iron Grates
- Griddles, and more
Sometimes one or two will come with your new Kamado package depending on which one you buy. But beware you can really get carried away with the extras and the different types of grate.
Dome:
The dome of the Kamado is otherwise known generally as the lid. To prevent unnecessary and bad moisture as well as to act as an important seal creating a tight seal when closed that greatly aids in the much-needed heat retention. For this purpose, you will find at the bottom of the dome or lid a typical lining of a felt-like type of material.
Thermometer:
All domes are equipped with its own thermometer. This tells you the temperature on and in the dome only, but the more important temperature is the cooking surface temperature. With a number of devices to help you with this, the cooking surface thermometer and the dome thermometer can and will show differences by up to 50 degrees.
Hinge:
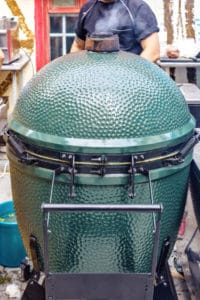
The Kamado has a part that for some reason is the most overlooked part and let’s not overlook the most important part of all, called the hinge, which connects the dome or lid to the base. If you don’t want to wake up on the big important entertainment day. To find you’re your dome all shattered which can because of a loose and rusted hinge.
Therefore this important part should always be checked for any looseness, rust or any other faults which should then be immediately repaired. By tightening anything that is loose and rust removal if standing outside exposed to the elements. You must remember the hinge itself is the only thing that’s standing between your dome and the hard or solid ground beneath which can cause all that damage if fallen onto.
Fire ring:
Sitting directly above your firebox is the fire ring, made from heat resistant ceramic, which creates an all-important gap or space.
Firebox:
Fuel like wood or charcoal is placed or poured into the firebox. The fuel you use like charcoal, and the cooking grate, usually depending on what your cooking or the temperature required. It will indicate how much and what fuel you put into this space, but typically up until the fire ring itself.
It also typically has some holes drilled into the sides for aerating purposes by allowing air to flow into and through the firebox to allow precious oxygen the fire needs to be maintained. Just inside, at the bottom of the firebox, you will find the fire grate.
Fire grate:
Situated on your firebox you will find your fire grate which is slotted and on to which you usually place or set your wood or charcoal. The slots are for small pieces of burnt or ashes wood and charcoal to fall through. Then they can be disposed of at a later time when cooled down, your fire grate may have slots or holes made exactly for this purpose.
Bottom vent:
To maintain the most important factor in any grilling process no matter what system is used is FIRE, and the Kamado does this with a bottom vent which acts as your primary air source and this is where the precious oxygen gets drawn in to keep your fuels burning and maintaining you cooking or grilling heat.
To get the higher temperatures required for grilling usually leave the bottom vent open 100% which will lead to a much higher intake of oxygen draw in. On the other hand, when I have achieved my desired temperature, for smoking, you just have to close the bottom vent down so that only about a half-inch or so is open, which maintains and not increase the heat but this takes practice.
That’s why I always say have as many friends over as many times as possible and show off this amazing griller and you will get all the practice needed to become the King Griller and Entertainer.
So a quick wrap up on this section on the ins and outs of the advantages of the Kamado over other gas and charcoal grills which will seem totally irrelevant and yesterday’s news.

Char-Griller Ceramic AKORN Kamado Charcoal Grill

Char-Griller Akorn Kamado Charcoal Grill
Controlling your Kamado’s temperature
Achieving and maintaining the temperature you are looking for will come easy, with a little patience, lots and lots of practice and some instruction. The obvious learning curve is quite simple especially if you don’t think of the Kamado Temperature Control System as a Daunting and Haunting experience.
So let’s see what we can do together to get over these first hurdles as easily and painless as possible to getting you closer to that King title.
Firstly we need to get some good and reliable charcoal. Remember the higher-priced charcoal isn’t always the better product. But always remember the better the charcoal the better heat you’ll get.
Then we need a fire starter cube or if you don’t have those use an electric or gas starters. Even your homemade ones will work. Just remember never use lighter fluid it will lave a bad taste in your food. It’s also bad for your kamado grill.
Controlling your Kamado’s temperature in a few easy steps to start off:
- Always make sure the top vent is fully opened and your dome or lid is closed properly.
- Once your Kamado gets to within 25 degrees of your desired temperature start closing your top and bottom vents. Don’t close the vents all the way just about halfway to slow the heating of the grill.
- Check your temperature after you’ve closed the vents about every 5 minutes or so. Until your required temperature is reached. After you’ve reached your desired temperature you’ll need to close the vents just a little more it keeps it there.
- If you need to lower or increase your temperature for any reason all you have to do is close or open the top vent for more control
Low-temperature achievement in a few steps explained:
- Starting with only one small area of your charcoal lit. For a nice smoking temperature of about 225 degrees and keep checking your temperature to make sure you get it right.
- Always make sure your dome is closed tightly but use the top vent to control the heat by leaving it open about half an inch and the draft door open at about one inch.
As this is perfect for your slow cooking periods, like smoking, as the name implies time is all you have as this process will make you wait.
Additional and useful tips
If you do not want to have to relight your charcoal over and over again for a good nice high temperature for searing, always use good quality fresh charcoal every time.
Always be mindful that for temperature differences and monitoring, it is always easier to raise your temperature than to actually lower it.
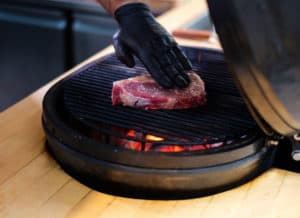
Want to take your grilling, barbecuing, smoking and cooking to the next extreme level, can be obtained as I have said before, easier and more efficiently the more you use your Kamado Griller. So use, use and use as long as no abuse.
Cleaning and keeping your Kamado Grill that way.
A lifetime of perfectly-cooked meals and delicious grills with perfect smoking can be provided for a lifetime by your new Kamado Griller if you take care of it properly. Like all things in life, to get the best and most out of it. The trick is just to give it a little bit of love and you will get back a lifetime in return.
Depending on the use of your Kamado, and once you start you will be doing it a lot, it has to be cleaned at least twice a year or more depending on usage just like any other regular grills, the ceramic grill is exactly the same but will be easier to clean.
Just a few tips on what you need to keep it clean:
- A little bit of love and a dirty grill that’s in need of it
- Charcoal (the good stuff always)
- A good strong clean plastic brush
- An old unused Shop-vac, dust buster or scoop for removing old and cold ash
Deep cleaning your grill, step by step.
One of the best things about cleaning you Kamado is like any other ceramic grill is that it is almost a self-cleaning system like a self-cleaning oven procedure. All you do is brush it down and a nice damp cloth clean up afterward but first, you have to heat it up and let it sit like that to burn off its own dirt and grease. This will help in sterilizing it as well not only just cleaning of all burnt debris.
So, let’s get into the 14 step cleanup procedure without further ado:
- At the bottom of the grill start a fire
- Add your defector rack including you the deflector on this fire as well as the grill and if any other of your cooking surfaces need cleaning like the pizza stone, add these to.
- By closing the lid or dome bring you to heat up to about 650 degrees F to about 750 degrees F
- Let this sit and heat like that for about half an hour to about an hour
- Now let it cool down completely preferably overnight and don’t forget to open all the vents.
- Once nice and cooled down (next day) remove all the accessories you placed in the Kamado like the grill, heat deflector, and rack, etc.
- Charcoal should be nice and cooled down now and can be cleaned up and disposed of in your usual way making sure no charcoal dust gets back onto or into Kamado.
- Remove your fire ring and fire rack but do so with much care and delicacy.
- Like the charcoal, now remove all remaining ash with the same precautions.
- Brush down everything and I mean everything, from the inside of the grill, the ceramic pieces, the grill, etc. using a nice clean but sturdy brush.
- Now once again we get to any remaining ash and once again like the previous ash and charcoal remove without spilling or allowing re-entering grill by using a shop vac, damp cloth or a scoop. Always make sure you use items you not going to use anywhere else as ash cans spread and stick to anything.
- Place deflector and ceramics can now be reassembled but always remember to use care.
- Using a good cooking spray, once again the more expensive the better the product, and spray your grill thoroughly in a well-ventilated area.
- If so desired, now you can wipe down the outside of the grill with a nice damp clean and soft cloth and then replace the grill
And hey Presto! Another season of clean and shiny grill days lay ahead. Or if you are like me, being the King of Grills, I do grilling weekends every weekend. So for me, its another month of clean shiny delicious grilling, as my cleaning sessions are done on a monthly basis and make sure to use noncorrosive natural cleaning products I will stay the King of Grilling. So step back and admire your handy work and think about next weekend’s grilling experience.
Safe and pleasurable usage of you Kamado Griller
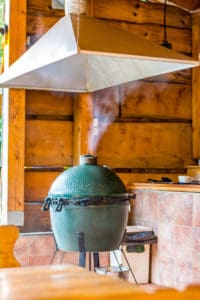
Apart from being the best at cooking or grilling one of the best ways to become a King of Grillers is to have an excellent safety record. A get-together and entertaining can be fun but also have hidden dangers and how you prevent or react can save a life or serious damage.
This is quite a simple process for every day or weekend Kamado users, to ensure safety for all. The most important step I will mention here and not on the list is. Always make sure before you open the dome or lid that your fire is getting enough oxygen as this can prevent a backdraft.
So now without further ado my steps to follow for a nice and safe day of Kamado grilling, smoking, and cooking:
- Even though your Kamado is weatherproof but should always be kept under covers, never ever use it indoors and always store outdoors
- Never try and discard hot ash. This is not just dangerous for the person doing it and those around him but most dirt or debris storage facilities are flammable. “Just a quick mention from my hub of useless knowledge but did you know if you kill or cool down hot coals wither water.
- It will cool rapidly but as that water evaporates the coal starts reheating quickly and sometimes can reignite.”. So always wait for ashes or remaining coals to cool down naturally before you try and remove it and or cleaning the grill.
- If you Kamado is still in use or has any hot coals or ash in it please do not try and move it. Rather let a meal be destroyed by being exposed to rain or a sprinkler you forgot about than to end up in the hospital for burns.
- Always try and use an electric or gas charcoal starter or even a charcoal chimney starter but never use any combustible liquids when lighting your Kamado. It can be absorbed by your ceramics and cause major problems afterward.
So now you know how to get started and become a King or Queen of Grilling in your family or community, so the last words to say are: Just go out, get one and start doing it. If I can so can you.
As Always, Happy Grilling!

Kamado Joe Classic II Ceramic Charcoal Grill

