If you’re looking for a way to clean your charcoal grill, maintenance tips, and also selecting the right charcoal for your grill, then you just clicked on the right article.
In this article, we will take a look at how to easily clean your grill before and after use, how to deep clean your grill and why it is important that you clean your grill, and also, share with you some tips on maintenance and how to choose the right charcoal for your grill.
How to Easily Clean Your Grill
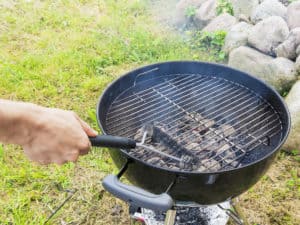
The grill I will be using for this tutorial will be the Weber Kettle Grill. This grill sets the standard for all charcoal grills out there. It is important that you clean your grill before and after every use.
Tools Needed to Clean Your Grill
- Old Forge Paint Brush
- Paint Roller Handle: I like using this because it’s rounded, and there is no sharp edges
- A dirty grate brush and a clean grate brush.
- Spoon
- Aluminum Foil
Step 1:
Remove all the parts from the kettle of the grill. This includes the cooking grates, charcoal bowl, and bottom grate.
Now, if you have any grease laying in your kettle, you want to use the paint roller handle to knock some ashes around the kettle. That way the grease will be soaked up with ash making it tacky and gooey. This will make it easy to shove down.
Open up the on the bottom of the kettle by adjusting the blades using your controlling arm. And with your roller handle, shove all the ash down the vents at the bottom of the kettle. If there are any other residues of ashes left, you want to use your brush to brush down all the dust into the ash pan.
To prevent your ash pan from having any gooey mess from the ash and grease mixes, you want to cover the bottom of the pan with an aluminum foil. This way you can easily dispose of the ash– by taking out the aluminum foil once you push it all down the vents.
Step 2:
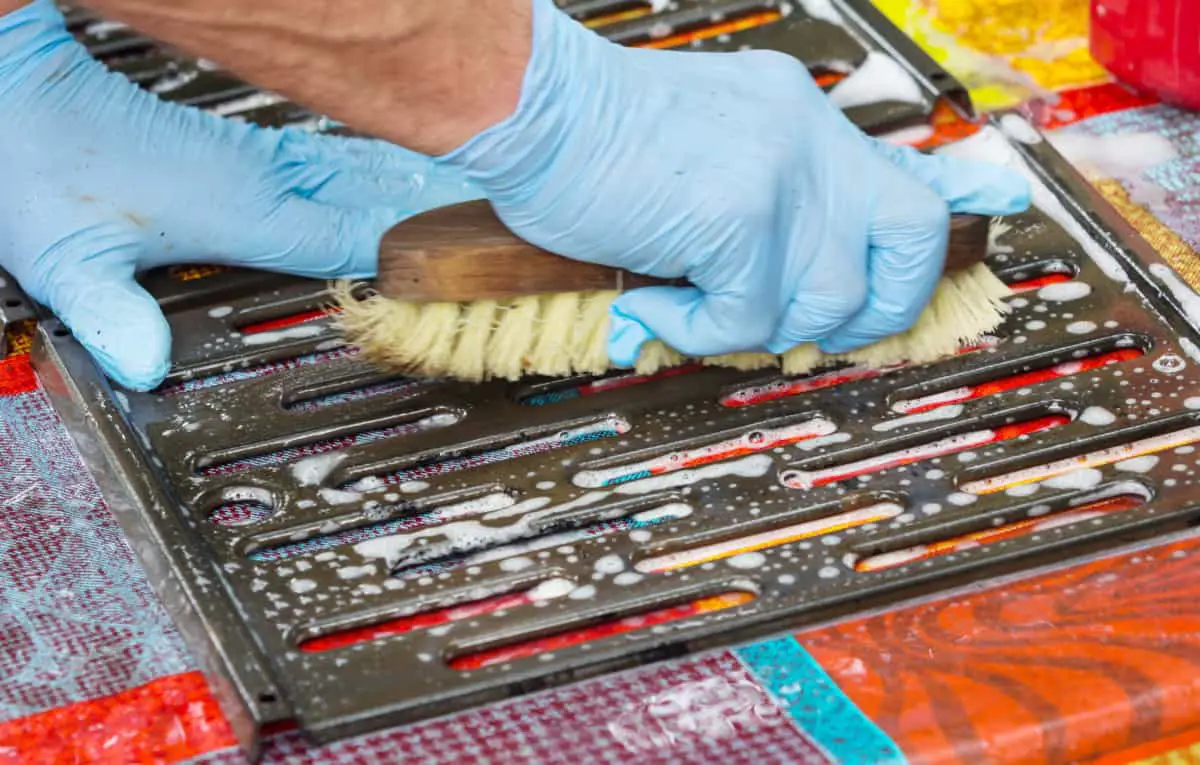
To clean off your grates, this is when you utilize your clean and dirty grate brushes.
After you’re done the cooking and you have all the grease and buildup on your grates, you want to use the dirty brush to get rid of that buildup.
The reason why you want to use two brushes is that after each cook, you have all the food and grease on your grates, so you want that to be on one brush. So if it starts getting dirty and greasy, it stays on the dirty brush.
Before you cook, after you have fired up your grates, and ones it is good and hot, you want to use your clean grate brush, to scrub off any excess buildup on your grill. When done, rub it off with a wet paper towel. And trust me if you do that, you will be surprised how much grease you will get off it.
Note: If you’re going to wipe your grates with a wet cloth, don’t do it after a cook. Do it before you cook even though you might still get the grease off, however, the grates will be wet and it will cause it to rust. So, always do it while the grates are hot and before you cook.
Step 3:
Flip your grate upside down, and scrub it with a brush to knock any buildup off. And finally, to get the buildup from underneath your lid, you want to utilize your paintbrush, soup spoon, and some balled-up aluminum foil.
You want to knock off the flakes using your spoon, by hitting the whole rim of the lid gently with your spoon. When done, take your brush and brush off all the flakes into one area, and dump it into the ash pan.
If there are still any flakes or dirt attached to the lid, use the balled aluminum foil to get those off by rubbing it around the rim and edges of the lid.
One area you might want to take care of, is the vents on the lid, use the balled foil to clean the edges of the lid. Also, do not forget to clean the probe of your thermometer. That way you will get a true reading from your thermometer.
When done using the aluminum foil, use your brush to gather the flakes and dust that is left together and dump that out. Then use a damped cloth or a damped paper towel to clean the whole lid, to get the remaining dust out.
Step 4:
For the outside of your lid, once you fire up your grill for a cook, put the lid back on. Take a wet cloth, and clean the outside of the lid while it is warm. However, you have to be careful you do not burn yourself. You can also use Mr.Clean Magic Eraser to get the job done.
How to Deep Clean a Charcoal Grill
This is what I call maintenance cleaning. I recommend that you do this twice or at least once a year to maintain your grills longevity and to get all the buildup out of your grill.
Step 1:
The first thing you want to do is to remove the temperature gauge from the inside of the lid. This is because you wouldn’t want it getting wet. This can be done by loosening the nut on the back of the temperature gauge. It should then pull out the front of the grill.
Step2:
When done, take the charcoal baskets, tray( bottom grate) and cooking grates out, give them a dust off to get all the ashes off and put them aside. You do not need to worry if they are rusty. Normally, the baskets are good for 10-15 years. However, we will still outline how to clean your rusty grates and charcoal baskets.
Step 3:
Now you want to get the ashes or most of it down the ash pan. This can be done by rotating the blades using your controlling arm or even pushing the ashes through the vents of the grill. When your done, use an old barbecue wipe to wipe the inside. In most cases, you can leave it like that, and you’re good to go. However, since this is a deep clean, you will have to take it a step further.
Step 4:
Use an oven cleaner such as Mr. Muscle Oven cleaner, you may use any oven cleaner of your choice. Spray the inside of your charcoal grill as well as the lid with your oven cleaner.
Step 5:
Now you have the inside of your charcoal grill, covered in an oven cleaner, you want to put back on your cooking grates, and lightly spray the grill grates with the oven cleaner.
Step 6:
Now that you have your lid, oven and grates sprayed with your oven cleaner, put the lid back on, close the adjustable vent and leave the charcoal grill for three to four hours.
Step 7:
While your waiting for three to four hours, you might as well give the charcoal baskets and tray ( bottom grate ) a bit of a cleanup. This can be done by spraying some water over this equipment using a water hose. When done, put them aside to dry, and then wipe them over, and your done.
Step 8:
When the four hour period is up, you want to go to your charcoal grill, take the lid off. By now the oven cleaner would be absorbed by the metal. Open the vents of your grill, by adjusting the blades. And with a high-pressure garden hose, spray the whole grill with water thoroughly. When done, do the same for the lid to get rid of all the crusty residue on it. Allow the kettle and lid to dry.
Step 9:
Now that you have hosed out your kettle grill you’re going to want to take the grill grates away and scrub them. Make sure you hose them off after your done scrubbing them to get any leftover oven cleaner off of them.
Step 10:
By now, you should have your kettle and lid looking spotless, however, if you want your kettle to be shiny, you can polish it up with some very fine steel wool once it is dried up.
Step 11:
Now you have all your parts dried up and clean, you want to reassemble all the parts so that you can have your charcoal grill ready for use. After a deep clean, you want to take some steps to prevent any chemical residue from contaminating your food. You should bring your grill up to cooking temperature without food on it to allow any chemical residue to burn off.
9 Maintenance Tips for Easy Use of Your Grill
Tip 1:
If you’re going to be cooking something that makes a lot of grease like chicken, or meatloaf, What you want to do is to put down some aluminum foil on the bottom grates of your grill.
Make a lip up along where it butts up against the charcoal and press it up against the side of the grill so that the grease doesn’t run down the in-between. This makes the cleanup easy because you can pick the foil up and just throw it away after use. Just to be clear do this in your indirect heat zone. You don’t want the aluminum foil under your charcoal.
Tip 2:
Do you have any grease buildup getting hard? Well, what you can do to get any grease and build up from getting hard is that for each cook, start by putting the charcoal on a different area of the grill, and the food on the other side. That way, you will have your grease on only one side of the grill. The next time you’re to have a cookout again, you want to put the coal on the side you had your food at during your previous cookout.
This will let the charcoal burn any grease that was formed from the previous cookout. So, if you alternate around the kettle, it will help keep anything from building up along the sides and edges of your grill.
Tip 3:
To help keep the grease and buildup along the edges of your grates at a minimal, you want to avoid putting the wood or coal underneath where the sub-grate is. What ends up happening when you do this is that, there is not enough heat along the edges then you’ll start to get that grease and buildup along the edges.
So, what you want to do to avoid this is to put the charcoal underneath each side, this will keep the grease burnt off. So, if you have a new grill and you want it to stay looking good and keep it looking clean, give this a try.
Tip 4:
If you’re not going to be keeping your grill in your shad or the garage when you’re not using it then you should have a cover for it. Using a grill cover to keep the weather off your grill when it’s not in use will help keep it looking new.
Tip 5:
If you’re cooking out during the winter when it is freezing, especially when it’s low below freezing, at the end of the cook that night- you want to run the controlling arm back and forth about 20 times. This will make it nice and loose for your next grill.
Also, after every cook during the winter, leave the vents in the kettle open. If you don’t leave the vents open they might freeze up. If you have them close it will freeze closed, and you wouldn’t be able to get your charcoal lit.
Tip 6:
If over the month you realize that your ash sweep or the blade control handle is getting hard to move around, what is happening is that you probably have grease underneath the paddles and when it is cold, the grease becomes stiff.
So, if you have tried cleaning that out and it doesn’t take care of the problem, here’s what you can do: Take a whole chimney load of hot coal, and dump it right over the top of your vents and within 10 – 15 mins you should be able to run the sweep back and forth. This will usually take care of the problem.
If you’re doing a lot of low-temperature cooks ( bbq) with your grill, then you may encounter such a problem. But with a high-temperature cook the grease should burn off, and the stiff grease will melts off for you. If you have these troubles during winter give the above a try and you will be good to go till spring.
Tip 7:
You will notice that your grill brush always gets a lot of grease buildup on the tip. Well, what you can do is, fill your charcoal basket with hot coal, and then put your grill brush over the grates, and that will get the grease buildup out of the brush.
Tip 8:
If your grill doesn’t come with a thermometer, you can pick one from up any store, and then install it yourself and it should work perfectly fine.
If your going to be doing indirect cooking, you want to put the thermometer near the vents of the lid. Indirect cooking means you have your hot charcoals on one side of the grill, and your food on the other side of the grill. Also, whenever you’re doing an indirect cook, ensure to have your vent above the meat.
Most Weber grills have their thermometer opposite the vent. So, during an indirect cook, all that is telling you is how hot the kettle is on the opposite side of the food, thus the temperature of the hot charcoals.
So, if you put another thermometer over the food, there can be a temperature difference of up to 100 degrees or more depending on how hot the fire is.
So, you might want to consider getting an aftermarket brand thermometer so you can know what the temperature is in your food. If you use a Bluetooth thermometer you can keep track of the internal temperature on your phone.
Tip 9:
This tip is for food safety and food sanitation when using a charcoal grill, and it is one thing most people aren’t aware of is that, they cross-contaminate their food while grilling. Let’s use a scenario here:
Assuming you buy some ground beef, which is infested with E.Coli or Salmonella. When you put the burger on your grill with your spatula, and then you flip it over and press down on it. That meat that is tainted with E.coli or anything, the bacteria when you touch it gets on the spatula and stays there.
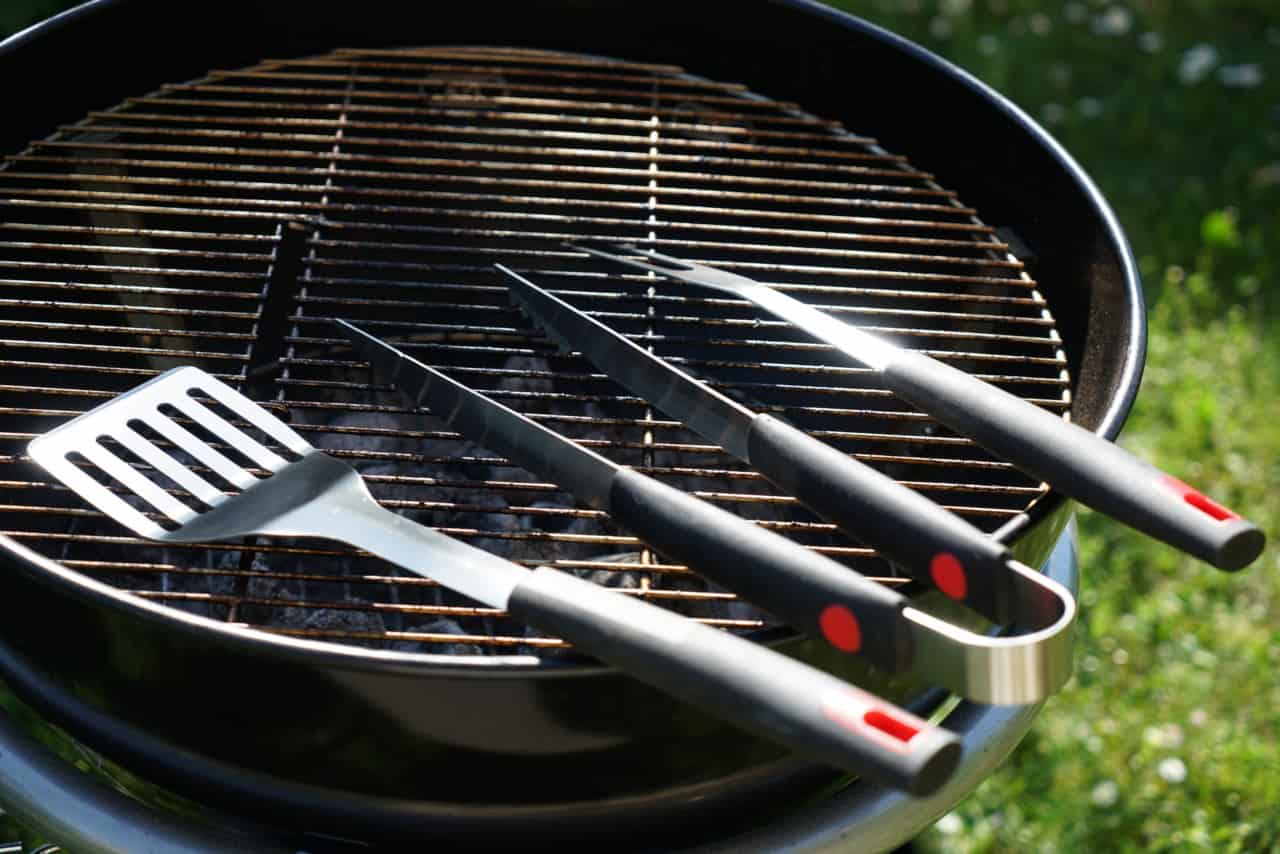
So, when you cook your burger and you take that off, and you put it on your bun, anything that was on the spatula is now right back on the piece of meat. So, what you want to do in this instance is to use two spatulas.
One for putting the meat on the grill, and the other for taking the meat off the grill after cooking to prevent any cross-contamination. However, if you don’t have a second spatula, ensure that you put your spatula in bleach and wash it before you take the meat off the grill and put it on your bun. The same goes for your tongs if you’re grilling chicken.
Why Should I Clean My Grill Before Use?
Aside from the facts that your grill might get rusty, and some other reasons, here are some reasons why you need to clean your grill before using it.
You never know what the previous users left on the grates. Therefore cleaning your grill is crucial, especially for public grills at beaches. If you do not have much equipment with you, you can slice a piece of onion and then use the onion to clean your grates.
It is important that you clean your grates before and after use because you need to get rid of all the food buildup. Leaving the food residue may lead to bacteria growth. And these bacteria can produce protein toxins, which can be bad for your health. Some other reasons why you should clean your grill includes grease fires due to buildup, and also rust.
Types of Charcoal for Grilling
If you’re wondering if you should buy charcoal briquettes or lump charcoal, then you might want to read this section.
Before I start with which one might be good for you, I want to say that, as long as you have fire and meat, you can grill or barbecue. But you will find out that, using the right tools will make the job a lot easier.
As said earlier, when it comes to charcoal, the two main options are:
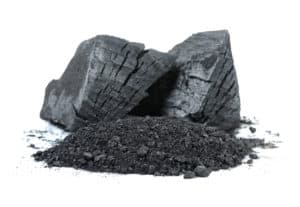
Lump Charcoal
This is wood that has been charred and turned in to charcoal. It still looks like a piece of wood. You will find out that a lot of companies that market it telling you specifically what type of wood it is. Lump charcoal is the goto for most BBQ pit masters. This is due to the fact that it’s all-natural and burns hotter than briquettes.
Charcoal Briquettes
This is sawdust that has been charred and turn in to charcoal, mixed with some binders, and then pressed into its uniform briquettes shape. This process does two things. The first is sins every piece is very similar, you’ll get a more uniform burn, times will be easier to calculate, and temperature fluctuations shouldn’t be rampant as it would with lump charcoal.
This, however, comes with a disadvantage. The downside to this is that some of the companies put a few too many binders in there, which gives you a foul taste, or a nasty ignition smoke, so if you want to go in for a briquette, I recommend you get a high-quality brand.
So, I will say no matter the charcoal type you go with, just go in for a quality brand. A brand that is known for producing high-quality charcoal. You don’t want to get a brand that has either of these charcoal types mixed with weird chemicals and binders, because you won’t have a good time grilling.
If you want to learn more about charcoal and how it’s made you can click here. Also, you want to try something different at your next cookout you can click here and find different charcoals from around the world.
How Do I Know Which Type of Charcoal I Should Use?
Well, to know which type of charcoal to use, you need to first know what you want to do. For instance, the pros of lump charcoal are that it typically burns hotter than briquette charcoal. Also because it is real wood that is charred, you can get a little bit of that hardwood flavor that the charcoal is made out of.
If you’re someone that is looking for a high heat cook, then I recommend you get yourself some lump charcoal. An example will be for those searing a steak, or if you’re into barbecue and you like to cook hot and fast, then lump charcoal is what I recommend for you.
The pros of the briquette charcoal are that, because they are all uniform, you get a much more controlled heat. They generally do not provide as much heat as lump charcoal, however, you’re a little more consistent with how long it is going to burn and what temperature it is going to burn at. I recommend charcoal briquettes for people who like to go low and slow with their grill. An example will be for those who might want to cook pork but say at 250 for a long time, then I recommend the briquette charcoal for you.
At the end of the day, both of these types of charcoals will give you a delicious barbecue. Chances are tho, one will be better for the specific job you want to get done, than the other. One last tip before I go, no matter which you use, they will both put off a little bit of an ignition smoke, so to avoid this, let your charcoal get nice and warm before you put it in your pit.
What this means is that, before you add meat to your grill or barbecue, make sure that there is no white puffy smoke coming out. You want the smoke to be blue and thin and trust me you are going to have a great time grilling. Now you know what charcoal type to use, it is important that you know how to light your charcoal.
How to Light Your Charcoal to Grill
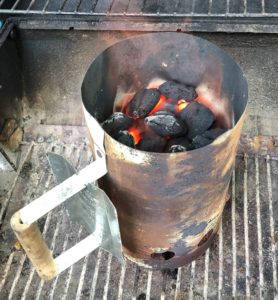
There are many ways to light charcoal. A couple of pieces of newspaper rolled up and stuffed up under the charcoal grates at the bottom. Wax cubes are inexpensive and easy to light.
Never use lighter fluid- it sucks. Lighter fluids are meant for two things, for lighting your campfire and burning garbage, so you do not want to use it when burning charcoal.
A chimney starter is your best option. These are cheaper, faster, efficient and cleaner. You will also want to get yourself a good stick lighter because a cigarette lighter can be inconvenient to use.
To use a chimney starter. Fill the chimney with charcoal, and stuff the newspaper or a wax cube underneath the chimney, and light the newspaper or cube and all you have to do is to wait.
If it is a windy day or you’re having trouble trying to get the charcoal to light, try putting some vegetable oil on the newspaper. This should get it going. Watch your coal, and watch the clock. This will take about 15 to 20 mins, and it will go through a series of stages.
It may seem nothing is happening, but eventually, there is going to be some smoke, some crackling and then some flame. You will know the coal is ready to dump out when the flames died down for the most part, with a beautiful hot glow.
You do not want to leave your charcoal in the chimney for too long, or else they are going to burn away. So, you want to take your coal out within 25 to 30 minutes.
And remember there isn’t any ash whitening agent in the lump charcoal, so, you might not get that clean, comforting ashed overlook you might expect with briquettes.
Conclusion
So, cleaning your grill and selecting the right charcoal for your grill isn’t that much of a job. But the little thing that can go wrong if you don’t keep up with your grill. That will quickly turn your fun week of grilling with friends and family into a disaster. No matter what charcoal you decide to go with you can still have a great cookout. But knowing what one will make your life easier will allow you having more time to catch up with everyone and not standing at the grill all day. I hope this article was helpful.
AS Always, Happy Grilling